
Get Started
Innovate, Educate and Deliver
You can't wait for inspiration, you have to go after it with a wearable...
scroll for more
Calibrate
After clicking on 'Start Session', an automatic pop-up will appear asking the BatSense to be calibrated. Follow the three steps of instruction that is also read out through audio. Once Calibration is successful, you can click on 'Start Session' and start playing.
Start Session
After Registering the BatSense, you can click on 'Start Session' and start playing.
Smart Video
Go to the Home Screen and Click on Smart Video and place the phone using a stable stand (tripod etc.) and start recording. Now, your shots will get captured automatically with every shot you play.
3d Analysis
On the Home Screen, you can click on '3D SHOT ANALYSIS' to view live shot parameters and 3D Avatar for every shot played during the session. Using this option will automatically disable Smart Video which means you won't get videos for shots during which you are viewing live data.
Session Summary & Calendar
You can choose to complete your entire session, then 'STOP SESSION' and view the entire session summary through the 'Calendar' option. Each session of yours is saved under their respective dates in the 'Calendar' section available on the Home Screen at the bottom.
Match Mode & Sync
After turning off the Match Mode, you have to “Sync” all your captured data. This will allow all the data to transmit from the BatSense device to your Smartphone. There is a complete section dedicated to explaining the use and technicalities of Match Mode option. Head over to that section to understand better.
LED Indications
LED first shows the connection status followed by battery status.
Connection Status
White : Not Connected
Blue : Connected
Battery Status
Green : Charge more than 80%
Yellow : Charge between 80% to 20%
Red : Charge below 20%
Session Status
3 Blue Blinks followed by Battery status – Connected but 'Not in Session'
1 Blue Blink followed by Battery status – Connected and 'In-Session'
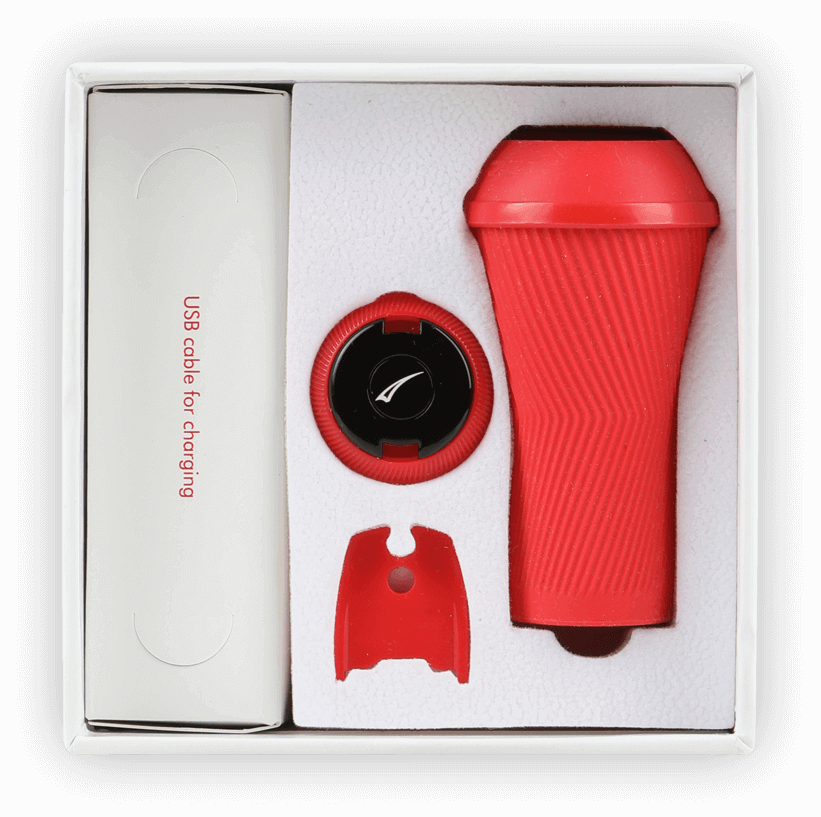
What's In The Box?
1 - Batsense
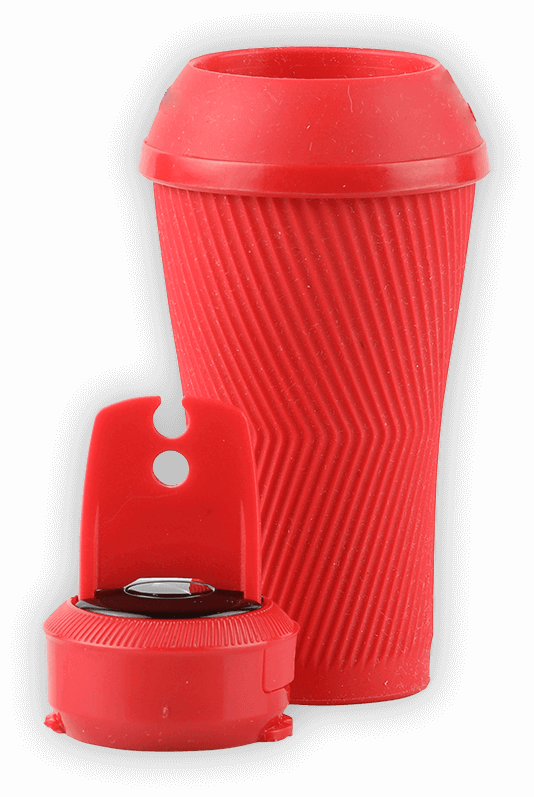
2 - Locking Key
3 - Sleeve
4 - Charging Cable
Batsense specifications
Small Size
2cm diameter
Light Weight
20 Grams
Rechargeable
Battery
Upto 8 hours
of play time
Check battery
status on app
Cloud
storage
Product information
- A small highly functional device that can be mounted on the bat handle in seconds and provides in-depth analysis about shots played and thereby subsequently improving performances.
- Mount on the bat handle and start evaluating shots real time.
- Dynamic design of the sleeve allows the BatSense to be mounted on all bat sizes.
- Free App to deliver seamless data on a smartphone.
- Multitude of training videos curated by experts provides player with insight into improving performances.
Quick Links
Reach Us
For enquiries contact@smartcricket.com
For sales sales@smartcricket.com
For customer support support@smartcricket.com
Connect With Us
Available On